This is a delicious and simple pie crust that is so easy, but so delicious! It is light and flakey, and only takes a few minutes to make. Pie crust is one of those things that is often scary to make because it is easy to mess it up. But it really isn’t complicated, and your family will be impressed that you can make pie crust! It tastes so much better than store-bought pie crust. You can use butter or shortening with this recipe, whichever you prefer.
Preparation:
1. In a medium sized mixing bowl, combine the Flour and the Salt. Stir it together with a fork.
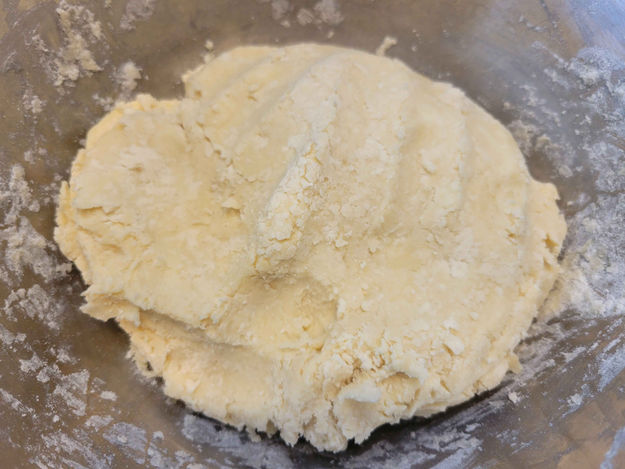
2. Place the Butter or Shortening in the bowl. Either with a fork or a pastry cutter, mash the butter into the flour mixture until it no longer has large chunks of butter. You want small chunks of flour and butter. If you mix the butter all the way into the flour, the pie crust will be hard. See the picture for an example.
3. In a separate bowl, mix the Egg, Vinegar, and the Cold Water.
4. Add the wet ingredients to the flour mixture. Stir it together until it starts to form a ball of dough. Then with your hands, mash the dough together to make it into a ball of dough. Then knead the dough 3-5 times until it is mixed. You really don’t want to knead it any more than that. The more you work with the dough, then harder your pie crust will be. We want it to be soft and flakey.
5. Cover the ball of dough and refrigerate it for 30-45 minutes, or until it is slightly firm.
6. Preheat the oven to 400°F.
7. Cut the dough in half. Each half of dough will make one pie crust. You can use one recipe for a pie with a top and a bottom crust, or you can make 2 pie shells with no top.
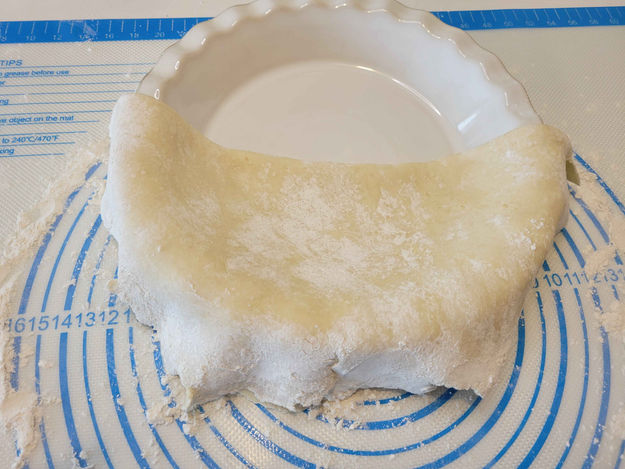
8. I use a silicone mat to roll my crust out because it doesn’t stick as much. Use plenty of flour on a hard surface. I roll my ball in flour before I roll it out. Roll the pie crust out thin. See the picture for more detail.
9. When the pie crust is rolled, fold it in half and place the pie dish right next to the folded pie crust. Carefully lift the pie crust into the pie dish. Unfold the crust and fit the crust snuggly around the pie dish.
10. Trim the extra pie dough. You will want to leave a ¼ inch extra around the rim of the pie crust to fold under.
11. Fold the extra pie dough under around the rim of the pie dish. Then press 2 fingers against one finger on the outside to make a crimped edge. See the picture for an example. Crimp the whole edge of the pie crust.
12. If you are baking a single pie crust with no filling, then poke holes around the bottom and the edge of the pie crust with a fork.
13. Bake at 400°F for 15-20 minutes, or until lightly golden brown.
14. Remove from the oven and cool.
15. Fill with your favorite pie recipe.
Cook Along with the Video or the Instructural Pictures

Hi, I'm Michelle Bartlett. Here at Just Like Grandma's Cooking I hope that you will find:
-
No Lengthy Stories
-
No Endless Scrolling
-
Just Practical Cooking using Regular Household Ingredients
Troubleshooting and Tips
Any trouble making this? Please put your comments below and I will respond as soon as I can!
Click here for the Pie Dishes that I use and love!
Having trouble with this recipe? Please leave a comment below or feel free to email me!
Printable Version
Comments & Reviews
-
Did You Like This Recipe?
-
Do You Have Any Alterations That You Would Like To Share?
Please Comment Below!
Please fill in all required fields
Name
Date
I'm a paragraph. Click here to add your own text and edit me. It's easy.
Reply
Please fill in all required fields
There are no comments yet.


